

When it comes to e-commerce, WordPress users have a wide range of options at their disposal. While the platform doesn’t enable you to set up an online store out of the box, you can use a top-notch plugin to do so with ease. For example, WooCommerce enables you to sell both digital and physical products.
The following advice is aimed at students who are looking to create their own online store to earn extra income. There are multiple benefits to running an e-commerce store, but the main plus point owning an almost passive income stream that operates even when you’re busy with your studies. Plus, if you’re using the right theme and extensions, you’ll be able to add advanced functionality to your site with ease.
This article will discuss why you should consider using WooCommerce, and explain what it can offer you. Then it will demonstrate how to set up the platform in three simple steps, and talk about how using the right e-commerce theme – such as Shoppe – can help you easily implement new features in your store!
Why You Should Consider Using WooCommerce

WooCommerce is by far the most popular e-commerce solution for WordPress, although there are certainly other options. Its ease of use and high level of polish make it the best choice for many stores, both big and small.

However, if you’re still on the fence, check out the ways WooCommerce can help you build a successful online store:
- It’s easy to use: Getting started is simple, and you can find plenty of guides (such as this one!) to help you along the way.
- The feature set is impressive: WooCommerce has almost all the features you’ll need for your store, including the ability to add, organize, and manage products and inventory.
- There are plenty of extensions: If WooCommerce doesn’t offer a feature you need by default, chances are there’s an extension that can help you set it up.
- You get access to regular updates: This plugin enjoys a healthy development cycle and has an active community, so it’s always up-to-date.
Now that the case has been made for WooCommerce, it’s time to check out how to set up your first online store using the plugin.
How to Set Up Your Online Store With WooCommerce (In 3 Simple Steps)
Before you can start using WooCommerce, you will, of course, need to set up a WordPress website. Then, you’ll need to install and activate the plugin.
When you’re ready on both counts, proceed to the first step.
Step #1: Customize Your Store’s Settings and Add Your First Products
After activating WooCommerce, you’ll be prompted to run its setup wizard. This is not a strictly necessary step, but it’s recommended to do so, since the wizard will enable you to customize your store’s main settings quickly:
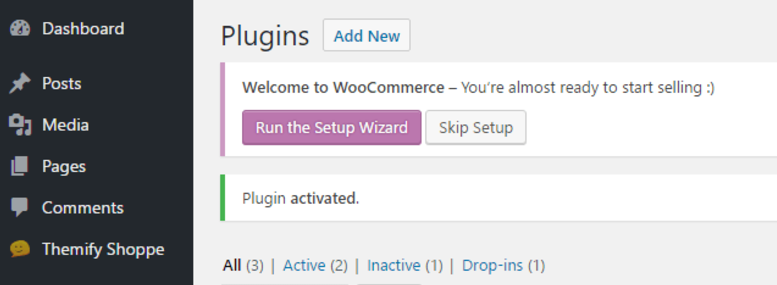
The Setup Wizard will take you through a few simple steps, such as creating the pages you’ll need, choosing your currency, picking your shipping settings, and selecting which payment processors to use.
After you’ve made your way through the Setup Wizard, all that’s left before your grand opening is to add a few products to your store, which you can do from the new Products tab on your dashboard:

You’ll find yourself in the WordPress editor, where you can set a name and a description for your product:
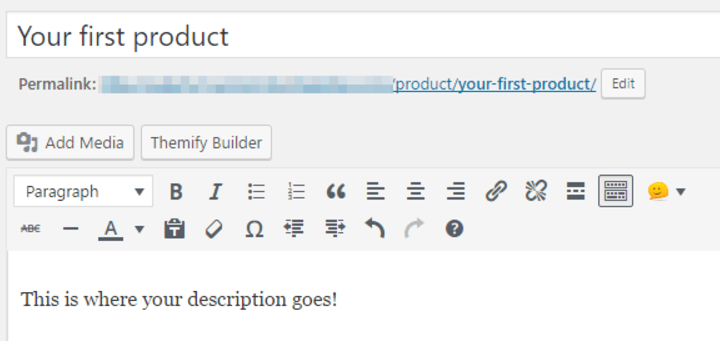
Aside from providing a marketing boost, descriptions are also the perfect place to include any important notes customers should pay attention to. For example, if your product is digital, will they receive it via email? Will it expire, and if so, when? That’s the kind of information a good description should look to include.
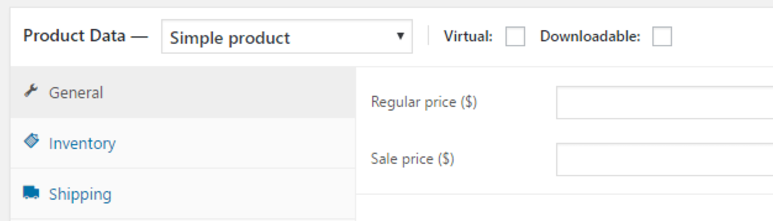
This page also enables you to choose between physical and virtual items. In most cases, your store will probably focus on one or the other:
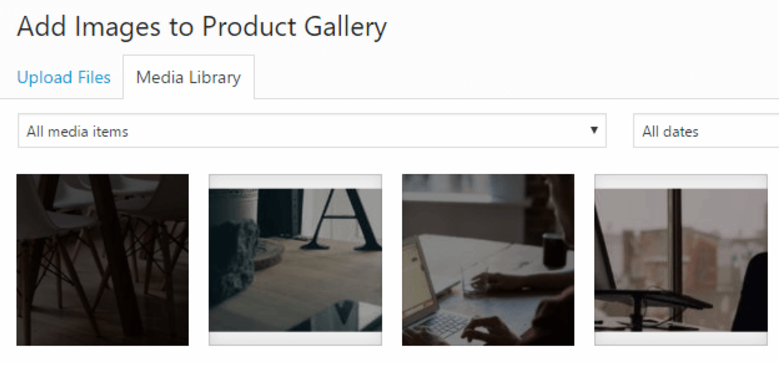
Don’t forget to set a featured image for your item, since that’s going to be one of the first things your customers will see! You can also upload more product images via the Product Gallery widget next to the editor:
 When you’re done, remember to preview your product to see how it looks live, then hit Publish when you’re ready. Here’s an example of a product that has been fully set up:
Remember – when it comes to product images, you want to make them as attractive as possible. That means taking high-resolution pictures of your physical items and compelling screenshots for any digital products. One of the main mistakes online stores selling digital goods make is not including screenshots of their products, which can turn potential clients away.
When you’re done perfecting the look of your product pages, move to the next step to learn more about how the right theme can level up your WooCommerce store.
Step #2: Set Up a WooCommerce-Friendly Theme
If you have some experience with WordPress, you probably know how much of a difference using the right theme can make. Fortunately, there are plenty of WooCommerce-friendly themes out there. Picking the right one can make your online store look much more professional.
Your best best is to go with an e-commerce theme designed specifically for WooCommerce. These often provide you with a drag-and-drop page builder you can use to customize your pages quickly and implement designs that are proven to convert visitors. This is critical for any budding online store, since the right design may help you start making a profit earlier than you expected.
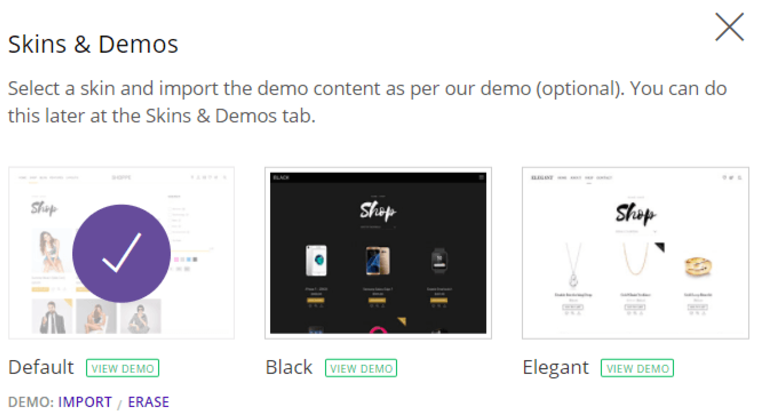
On the other hand, if you’re not familiar with the process of designing a website on your own, most e-commerce themes include plenty of pre-designed layouts and demo content to help you kick things off:
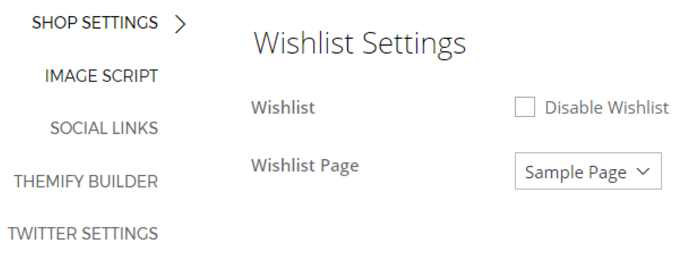
There are a lot of features you’ll want to implement as soon as possible to make your online store more user-friendly, and an e-commerce theme can help you get there faster. For example, wishlists are a mainstay of most online stores:
Finally, there’s one feature in particular that you want any good e-commerce theme to pay attention to: product images. As mentioned earlier, the right images can make or break a sale, and advanced functionality, such as an AJAX slider, can help make sure yours pop:

Now that you understand the importance of picking the right theme, there’s only one subject left to discuss that will round-off your new online store nicely – WooCommerce extensions.
Step #3: Consider Installing Extensions
To put it simply, WooCommerce extensions are similar to WordPress plugins. Although WooCommerce itself is a plugin, it has plenty of add-ons that you can use to extend its functionality even further.
Setting up extensions works just the same way as installing a regular plugin, and they come in all shapes and sizes. Take Product Add-Ons, for example:
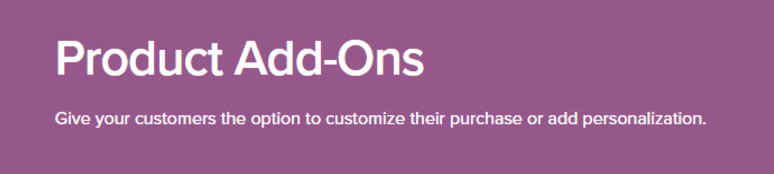
This straightforward extension enables you to add custom fields and drop-down menus to your products, giving you more control over your items (which is something any store could benefit from).
Product Add-Ons isn’t the only extension worth your time. In fact, there are hundreds of them on WooCommerce’s official repository – some free and others premium. If you want help sorting the good from the bad, an online roundup is a great place to start.
Conclusion
As a student, an online store could be key for topping up your income during your studies. If you’re planning to set up an online store using WordPress, WooCommerce should be the first option you consider. Not only is it one of the most polished and reliable e-commerce plugins available, it’s also easy to set up and benefits from a vibrant (and helpful) community.
Here’s a recap of the three steps you need to take to get your first e-commerce store up and running after installing WooCommerce:
- Customize your store’s settings and add your first products.
- Set up a WooCommerce-friendly theme.
- Consider installing extensions.
Once you’ve done this, an almost passive income stream is at your fingertips! Good luck!

Tags:
Education